Last updated November 18, 2026

Free written scope consultation - allowances, timeline, and change-order rules on paper before a single trade is scheduled
Driveway & Pavers Maintenance Checklist for Henderson Homeowners
If your pavers are fading, shifting, or cracking within five years of installation in Henderson, there’s a 70% chance it’s a maintenance failure, not a product failure, and no one told you what to do after the crew left. Henderson’s UV index runs high enough to bake color out of a sealer in two summers. Monsoon runoff can hollow out a base in one. The material was never the problem; the missing schedule was. This checklist covers the Henderson-specific routine that keeps pavers tight, level, and looking new: sealing timelines that follow our actual sun exposure, drainage checks before storm season, the weeds that target paver joints here, and what your installer’s warranty really covers.
Quick Answer
Henderson homeowners should inspect pavers twice a year (March and September), replenish joint sand whenever it drops more than 1/4 inch below the surface, seal every 18 months to 2 years because of our UV load, and clear and test drainage before each monsoon season. Most premature paver failure in Henderson traces back to skipped joint sand and blocked drainage, not bad materials.
Styles & brands we work with
- Kitchen remodeling
- Bathroom remodeling
- Home additions & ADU
- Roofing
- Windows & doors
- Driveway & pavers
- Fence
Table of Contents
- Why Pavers Fail Early in Henderson
- The Sealing Schedule That Fits Henderson’s UV Exposure
- Monsoon Runoff: How Water Undercuts Paver Bases
- Joint Sand Replenishment: Cosmetic vs. Structural
- The Henderson Weed Species That Invade Paver Joints
- What Installer Warranties Cover vs. What Becomes Yours
- Your Twice-Yearly Inspection Checklists
- Common Mistakes to Avoid
Why Pavers Fail Early in Henderson
Henderson sits in a climate that stresses hardscape in two opposite directions. Summer surface temperatures on unshaded pavers routinely push past 140°F, which accelerates the breakdown of polymeric joint sand and wears sealers thin faster than nearly any other part of the country. Then the monsoon arrives in July and August and dumps a month of rain in an afternoon, sending sheet flow across driveways and patios that were dry for nine months. The base never got tested under that kind of water load until it did.
What homeowners see is the aftermath: pavers that settle a quarter inch, joints that open up, weed lines that appear overnight, and color that looks washed out. It reads like a bad install. Usually it isn’t.
In our experience across Henderson neighborhoods, the pattern repeats. A driveway installed with a proper compacted aggregate base and a solid edge restraint will hold up for years if it’s maintained. The same driveway with joint sand left to wash out will start moving within three seasons, no matter how good the original work was. The base is doing its job; the joint sand was the lock, and once it’s gone the pavers have room to shift.
Two local factors make this worse than homeowners expect:
- UV exposure. Henderson’s clear-sky days are numerous, and sealer takes the damage instead of the paver color. Skip resealing and the color fades from the surface down, which no cleaning can reverse.
- Caliche and clay subgrades. Much of Henderson’s soil drains poorly once it’s saturated. Water that pools under a driveway has nowhere to go, and the base loses compaction.
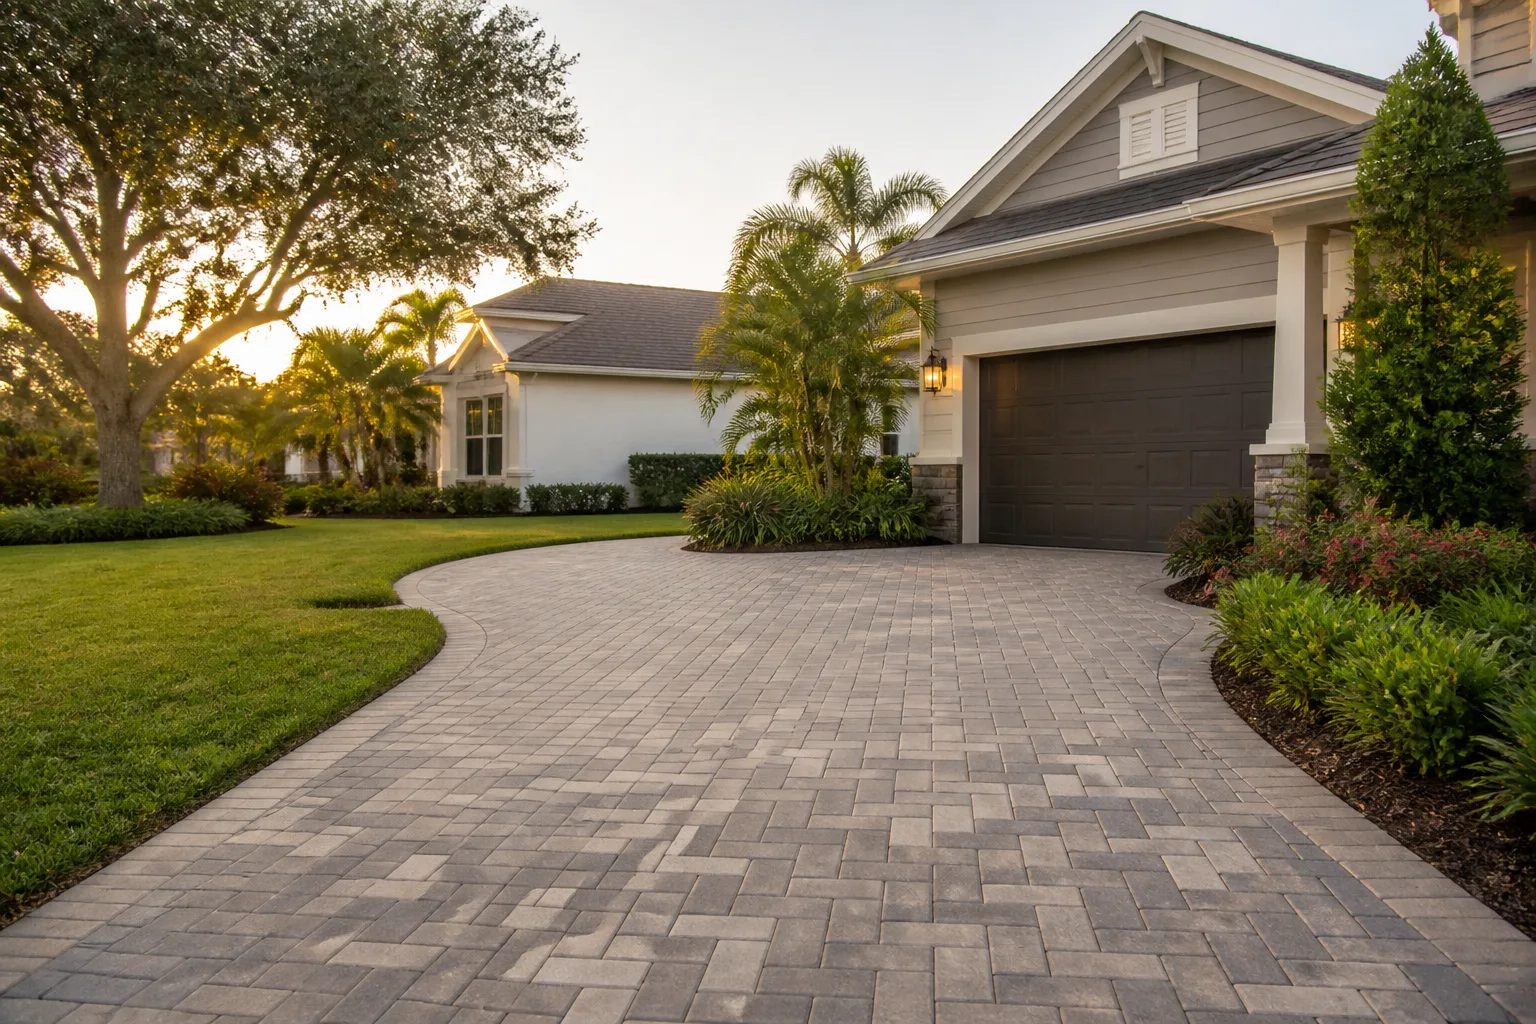
That’s why maintenance here isn’t a once-a-decade afterthought. It’s a schedule tied to our seasons. If you’re weighing a new installation versus repairing what you have, our guide to Driveway & Pavers in Henderson walks through what a properly built base and edge restraint look like, which is the foundation everything on this checklist protects.
The Sealing Schedule That Fits Henderson’s UV Exposure
Ignore the generic “seal every 2 to 3 years” advice. Henderson’s UV index is high enough that most sealers lose their protective film in 18 to 24 months, and on a south- or west-facing driveway that gets full afternoon sun, 18 months is the realistic ceiling. North-facing and shaded surfaces can stretch closer to 30 months.
How to tell it’s time rather than guessing:
- Water test. Pour a cup of water on the pavers. If it beads and rolls, the sealer is intact. If it darkens the surface and soaks in within a few seconds, the film is gone.
- Color check. Compare an exposed paver to one under a doormat or in permanent shade. Visible lightening means UV has reached the surface.
- Chalk test. Scuff the surface with a coin. Sealed pavers resist; unsealed pavers leave a chalky mark.
For Henderson specifically, the best window to seal is late March through April and again in October. Surface temperatures need to be below about 85°F and the pavers need 24 hours dry before and after. Sealing in July or August is a mistake; the product flashes off before it cures and you get a cloudy finish.
Choose the sealer type based on the paver. Techo-Bloc and Cambridge Pavers both publish sealer compatibility specs, and a penetrating sealer is usually the safer choice on textured surfaces because it doesn’t build a film that can peel. Film-forming sealers look glossier but trap moisture if applied over damp pavers, which leads to efflorescence in the spring. On our installs, the joint sand product matters just as much as the sealer; Quikrete and Oldcastle both make stabilized joint sands that hold up better under Henderson’s temperature swings than plain sand.
One more Henderson note: dust. Our dry season kicks up fine grit that settles into sealer before it cures. If you’re sealing in spring, plan it for a calm morning after a light rinse, and don’t seal on a windy day. It’s the difference between a clean finish and a gritty one that never looks right.
Monsoon Runoff: How Water Undercuts Paver Bases
The monsoon is where neglected pavers in Henderson fail fastest. A driveway that drains fine during the dry months can take on water during a single July storm that runs off a slope or an adjacent roof and pools against the edge of the pavers. Once water gets under the edge restraint and into the bedding layer, it starts to move the fines out of the base. That’s called undermining, and it doesn’t show up until the surface dips.
Here’s what a real pre-monsoon drainage inspection looks like. Do this in late June, before the storms arrive:
- Walk the perimeter. Look for gaps where the pavers meet soil, garden beds, or a retaining wall. Water finds those gaps first.
- Check the slope. A properly laid driveway sheds water toward the street or a drain. Lay a straightedge across the pavers and look for low spots where water would pool.
- Inspect the edge restraint. Tap along the concrete or plastic edge with a rubber mallet. A hollow sound means the restraint has separated from the pavers and water can get in.
- Test the drain path. Run a hose at the high point of the driveway for two minutes and watch where the water goes. If it ponds or flows toward the house, you have a graded drainage problem.
- Check gutter downspouts. If a downspout discharges onto the driveway, that concentrated water load will erode the joint sand in weeks. Redirect it.
In Henderson neighborhoods with newer construction, we regularly see the drainage problem created not by the pavers but by adjacent landscaping. A low-water bed added alongside a driveway can change how water flows across the hardscape, and once the flow changes, so does the erosion pattern. If you’re reworking the side yard, coordinate it with the fence installation in Henderson, since fence footings near the driveway edge can trap water if they’re not set below the runoff line.
Joint Sand Replenishment: Cosmetic vs. Structural
Joint sand is the single most important part of paver maintenance and the most misunderstood. Homeowners see sand in the joints and assume it’s decorative. It isn’t. Packed joint sand is what locks the pavers together so the surface behaves like one slab instead of a loose pile of bricks. Lose enough of it and the pavers start to rotate and shift under the tires of a car, and once the pattern moves, you’re looking at a repair rather than maintenance.
How to tell the difference:
- Cosmetic. Joints are 1/8 to 1/4 inch low, pavers are still tight, no rocking, no movement underfoot. Top off with joint sand and you’re done.
- Structural. Joints are more than 1/4 inch low, individual pavers rock when you step on them, or you can see daylight through the joint. That means the bedding layer has failed under the surface, and adding sand won’t fix it. The pavers need to come up and be reset with a fresh bedding course.
Replenish joint sand every spring, and again after any heavy monsoon event that washed sand out. Use a stabilized or polymeric joint sand if you don’t plan to seal, and use regular sand if you’re sealing within a few weeks. Sweep it in at a 45-degree angle to the joints, compact it with a plate compactor, and add a second pass after the first settles. In Henderson, this job runs small and easy in March, right before the first hot stretch, so the sand has time to lock in before the sealing window closes.
Do not use straight play sand from a big-box store. It blows out. Oldcastle and Quikrete both sell joint sand graded for paver use, and the difference in longevity is measurable.
The Henderson Weed Species That Invade Paver Joints
Every climate has its paver weeds, and Henderson’s are particular. The three we see most often are:
- Bermudagrass. The most aggressive offender. It spreads by runners that move laterally under the sand and pop up between pavers. Pulling the top growth does nothing; the runner regrows.
- Palmer amaranth. A fast-growing summer weed that seeds aggressively. If it appears in a paver joint, it’s usually because the joint sand is thin and the seed hit the bedding layer.
- Spurge. Low, mat-forming, and it loves hot seams. It spreads seeds by the thousands from a single plant.
The right way to treat them without damaging the pavers:
- Fix the joint sand first. Most weeds grow where sand is missing. Refilling the joints removes the habitat, which is a bigger job than any herbicide.
- Pull Bermudagrass by the runner. Dig down to the root and pull the runner, not just the blade. If it’s spreading from a lawn adjacent to the driveway, install a physical barrier along the edge.
- Use a post-emergent on the joints, not the pavers. A glyphosate-based spot spray works, but apply it directly to the plant on a calm, cool morning. Spray drift that hits the pavers is harmless, but drift that hits adjacent landscaping is not. Read the label and follow it.
- Re-sand and seal. A sealed joint is a joint that weeds can’t push through.
Do not use a string trimmer against the pavers to knock down weeds. It chips the surface and opens pores that hold moisture, which is where efflorescence starts. The surface is the thing you’re trying to protect.
What Installer Warranties Cover vs. What Becomes Yours
Here’s the part nobody explains clearly. A legitimate installer warranty covers the work the installer performed: base preparation, compaction, edge restraint, leveling, and joint sand at the time of final walkthrough. It typically does not cover damage caused by water after the install, weeds, sealer failure, or settlement caused by drainage changes the homeowner made later.
In plain terms, the day after your final walkthrough, this list transfers to you:
- Replenishing joint sand as it washes out
- Resealing on the Henderson schedule
- Weed management
- Drainage maintenance, including downspout redirection
- Damage from vehicle loads the driveway wasn’t built for (heavy trailers, dumpsters)
- Settlement caused by landscaping changes near the pavers
What a solid warranty should stand behind includes base compaction, edge restraint, uneven settling traceable to workmanship, and material defects. Ask for the warranty in writing before the job starts and read specifically what voids it. Most warranties are voided by homeowner modifications, so document everything you do and keep receipts.
At Groundwork Construction Co., we back every project with our 730-Day Done Right Promise, one of the longest workmanship guarantees in the residential construction space. If it’s not done right, we make it right. That’s a written commitment, and it covers the work we performed. It doesn’t replace the maintenance on this page, and we’re honest about that. Both matter.
Your Twice-Yearly Inspection Checklists
Here’s the routine that actually works for Henderson. Do it in March and again in September.
March Inspection
- Walk the full perimeter of the driveway and any paver patios or walkways.
- Check joint sand depth at five random spots. Any spot below 1/4 inch gets filled.
- Water test the surface to decide if sealing is due this year.
- Inspect edge restraints. Tap with a rubber mallet and listen for hollow spots.
- Check the slope with a straightedge at the low point of the driveway.
- Clear any debris from the transition between pavers and landscaping.
- Pull any early-season weeds by the root.
- Confirm downspouts discharge away from the hardscape.
- If sealing, schedule for a calm dry morning with surface temps under 85°F.
September Inspection
- Recheck joint sand after the monsoon; expect to top off in erosion-prone spots.
- Look for new weeds, especially Bermudagrass runners along the edges.
- Check for efflorescence, the white powdery film that signals moisture trapped under the surface.
- Examine the slope after the rains. Any new low spots are a drainage red flag.
- Inspect any pavers adjacent to a fence or retaining wall for movement.
- If you added landscaping or a fence over the summer, check how runoff has changed.
- Note any pavers that have shifted since March for a spring repair.
If you’re planning a larger hardscape change, like adding a paver walkway to connect to a new structure, our team at Home Additions & ADU in Henderson can coordinate the drainage so the hardscape and the new build work together. More on our full-scope approach is on the Groundwork Construction Co. of Henderson home page.
Common Mistakes to Avoid
- Sealing on a hot day. Henderson afternoons hit 100°F from May through September, and sealer flashes off before it cures, leaving a cloudy or patchy finish. Seal in early spring or fall.
- Using play sand to fill joints. Straight play sand blows out in the first storm. Use graded joint sand from a supplier like Quikrete or Oldcastle.
- Skipping the joint sand because it looks fine. The joints always look fine right before they don’t. Measure the depth; don’t eyeball it.
- Pressure washing the pavers on blast. High pressure strips the joint sand and the sealer in one pass. Use low pressure with a surface cleaner if you clean at all.
- String-trimming against the surface. Trimmer heads chip pavers and open pores. Edge by hand.
- Ignoring downspouts. A downspout aimed at a paver joint erodes the sand in one season. Every year, check the outlet.
- Assuming the warranty covers the maintenance. A workmanship warranty covers the install. The list in the warranty section above transfers to you the day after the walkthrough.
See the difference
 Before
 After
 Before
 After
 Before
 After
When to Call a Professional
Some tasks are worth doing yourself. Refilling joint sand, pulling weeds by the root, redirecting a downspout, and running a water test are all fine to handle on your own. Call a professional when the pavers themselves have moved. If individual pavers rock underfoot, if the surface dips more than half an inch in one spot, if the edge restraint has pulled away, or if you see new settlement after a storm, the base has failed and the repair is bigger than sand and sealer. Structural repairs involve lifting the surface, re-compacting the bedding layer, and resetting the pavers, which is a job for someone with the right compaction equipment and the experience to diagnose what actually caused the failure. In Henderson, base failures are almost always a drainage story, and fixing the pavers without fixing the drainage means you’ll be back in the same spot within a year.
Groundwork Construction Co. of Henderson offers free estimates in Henderson. Our technicians have up to 12 years of experience, they’re background-checked and arrive in uniform, and the pricing is upfront so you see the number before the work starts. Call (844) 320-6757.
Frequently Asked Questions
Routine maintenance in Henderson typically runs $250 to $450 for a joint sand refill on a two-car driveway, $350 to $700 for a full sealing with surface prep, and $75 to $150 per hour for weed and inspection work. Structural repairs, where pavers have to be lifted and reset, run $8 to $14 per square foot. Call (844) 320-6757 for an exact quote. Estimates are free.
Sealers in Henderson last 18 to 24 months on sun-facing surfaces and up to 30 months on shaded ones, because of the region’s high UV index. The water test is the answer: if the surface darkens when you drop water on it, the sealer is gone. Call (844) 320-6757 to schedule an inspection and get a written quote for sealing.
Fading at three years means the sealer wore off and the paver color took direct UV exposure for a summer or two. Henderson’s sun bleaches the surface color first, and no sealer applied afterward restores the original tone. Re-sealing before the color fades is the only prevention. Call (844) 320-6757 and we’ll take a look and tell you honestly whether the color can be brought back.
No. Regular play sand blows out within a season, especially in Henderson where wind and monsoon runoff carry it away. Use a graded or stabilized joint sand; Quikrete and Oldcastle both make products designed for paver joints. If you want the joint to hold up for years, call (844) 320-6757 to have it done with proper compaction.
No. Workmanship warranties cover base preparation, edge restraints, and leveling, not maintenance items like weeds, joint sand, sealer, or damage from changed drainage. Those become the homeowner’s responsibility the day after the final walkthrough. Call (844) 320-6757 to see what maintenance plan makes sense for your driveway.
Run the pre-monsoon inspection in late June: check edge restraints, test the slope and drain path, clear downspouts, and refill any joints that are low. Doing it before the first storm is what prevents base undermining. Call (844) 320-6757 for a professional drainage inspection if you’re unsure whether your pavers are ready.
The Bottom Line
Henderson pavers don’t fail because of the material. They fail because the sun, the soil, and the monsoon stress a system that needs a schedule. Hit it twice a year, and you get a driveway that holds up for decades. The short version: water test to decide if sealing is due, check joint sand twice a year and refill when it’s below 1/4 inch, do the pre-monsoon drainage inspection in June, treat weeds by the root, and read your warranty so you know exactly what’s yours. Cover those five items and the pavers do their job. This checklist gives you a routine built for Henderson, not a generic one copied from a coastal climate where none of this applies.
Groundwork Construction Co. works across Henderson on hardscape projects, backed by our 730-Day Done Right Promise, upfront pricing, and free project estimate and design consult. We’ve been in business since 2014 and we’re proud of the work we’ve done in the neighborhoods we serve. Call (844) 320-6757 for a free estimate. Live people answer the phone.
Written by the team at Groundwork Construction Co. of Henderson.